Are you doing a solar project?
Modernize can pair you with three to four pros in your area, so you can compare options and save time and money.
- How Solar Pool Heaters Works
- Install the Solar Collectors
- Determine the Proper Position
- Deciding on the Size
- Set the Framework
- Mount the Collectors
- Run the Pipes in Between
- Complete the Installation
- Run the Plumbing
- Fitting All the Pipes
- The Vacuum Relief Valve
- The Check Valve
- The Bypass
- The Motorized Valve and Sun Sensor
- Isolation Valves
- Test out your solar pool heater
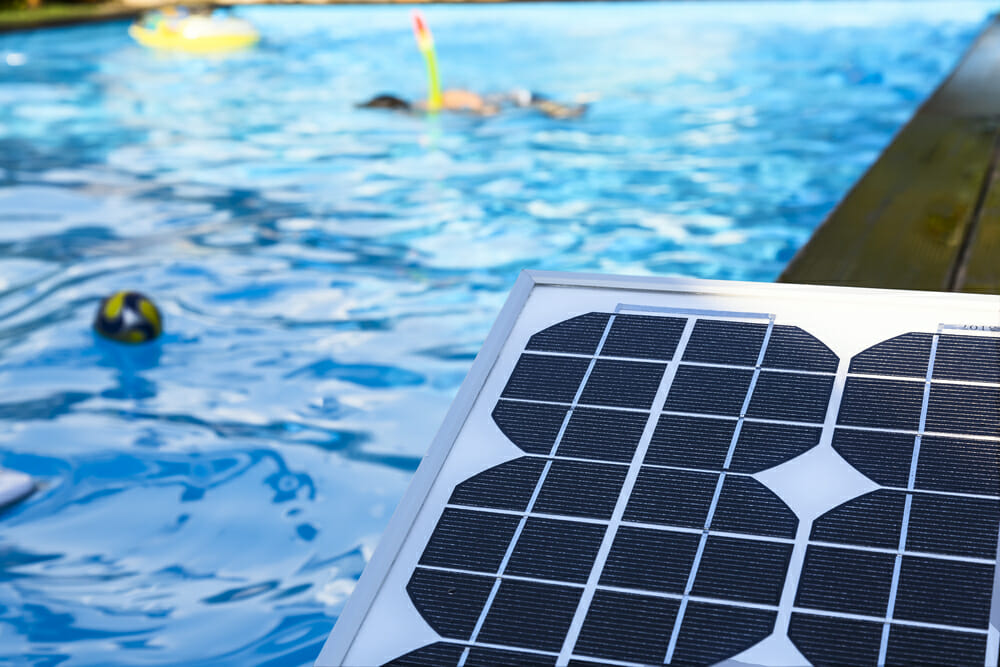
As summer draws to a close, it can be hard to say goodbye to the daily swims in your backyard pool. But there’s a way to extend your swimming season into the not-so-hot months—and it’s both economical and energy-efficient. It’s a solar pool heater—a system that generates heat from sunlight, which transfers right back into your pool water. It’s practically free to operate, and can stretch your pool season throughout the year but it’s important to understand how the solar pool heater installation process works, for proper installation and functionality.
How Solar Pool Heaters Works
The solar pool heater system is split up into components: the heating component—or solar collectors—and the transport component—or the plumbing. The collectors are mounted on your roof, and a series of pipes are connected to your existing pump and filter to channel the pool water up through your solar collectors and back into your pool, creating the warming effect.
Install the Solar Collectors
The solar collectors are one of the most important parts of your pool heating system—they generate the heat that warms the water. In order for the collectors to do their job properly, they must be properly installed, which requires a few careful steps.
Determine the Proper Position
To make the most of your solar collectors, position them facing either south—which produces the most sunlight and best results—or west, which offers just a slight decrease in productivity. An east-facing roof will still work, but it will cut your system efficiency in half. Never position the collectors on a northward-facing section of your home, however, because, in most cases, the system won’t produce enough heat to be worth the investment. The collectors should also be placed as close to your pool as possible, which will make it easier to run the plumbing later on.
Deciding on the Size
Based on the orientation of your roof and the size of your pool, you’ll have to determine the overall solar array size that you’ll need. A professional company will help with this calculation, but a good rough estimate is about 60 percent of the pool’s surface area for south-facing panels, 75 percent for west facing, and 100 percent for east facing. With those very basic calculations, it’s easy to see how choosing a southern roofline for your panels could save you money on collectors.
Set the Framework
Each collector will sit on a frame system designed to hold it in place—usually a series of metal rails attached right to the roof. A professional will secure the rails to your roof using bolts, screws, or other weatherproof fasteners to create a secure mounting point for the collectors. Because these fasteners need to be able to penetrate your current roofing and go down into the framing below, most kits don’t come with the hardware and must be purchased separately after the proper size is determined. Once that mounting point is all in place, it’s time to install the collector.
Mount the Collectors
The way that the systems are installed depends on the system you choose for your home. If you’re using a flat plate collector, the plates are lifted up to the roof and simply locked into position on the rails. If you decide on an evacuated tube system, the water tank and frame are mounted on the mounting brackets, and once it’s firmly in position all the evacuated tubes are installed and sealed for long-lasting performance.
Run the Pipes in Between
A set of PVC or rubber pipes is generally used to connect one panel to the other, using the inlet and outlet locations to do the job. Connect the outlet of the first panel nearest to the pool to the inlet of the next panel directly horizontal to that first panel. Continue doing this for each of the panels from one side of the house to the other until all the panels are connected to one another so that the water can flow freely through each.
Complete the Installation
After all the pieces are put into place, it’s important to verify that each of the collectors is locked firmly into position and ready to be attached to plumbing. Pull on each of the systems to check for security before moving on to installing the plumbing system.
Run the Plumbing
While the solar collectors generate the heat to warm your pool water, the plumbing system channels the water into those collectors, and carries the heated water back to the pool. Most pools already have an existing PVC loop running from the pool to the filter, possibly to a gas or electric heater and then back to the pool once again. With such a loop in place, installing the solar heater plumbing is simply a matter of running pipes off of that existing loop.
Find the Right Contractor for Your Solar Project
Whether you’re ready to begin your project now or need some expert advice, our network of contractors are here to help. With a few simple questions, we’ll find the best local professionals for you
Fitting All the Pipes
A pair of vertical pipes must run up the side of your home to the inlet and outlet ports of the collector array. Keep at least a foot of space between these two T’s if at all possible. Run a pipe up from the first T to the inlet side of the collector array, and run pipe down from the outlet of the array down to the second T to create a new loop.
To complete your setup, you should T off both of those vertical pipes a few feet up your house and connect the vertical plumbing together in a horizontal passageway—this allows water to flow through the system when the solar collectors aren’t being used.
Now that you have all the plumbing in place to make use of the heater, simply install the control and vacuum valves to give you control over when the heat is used and when it’s bypassed.
The Vacuum Relief Valve
Add a simple vacuum relief valve up at the top portion of your plumbing. This is usually right at the back upper corner of your collector array. The valve keeps the water loop from being completely closed so that when the pool pump is turned off, water doesn’t remain stuck in the collector array. Instead, it will simply drain back down into the lower plumbing and into the pool.
The Check Valve
Add in a check valve—a one-way valve between your pool filter and the first vertical pipe. The valve keeps water from flowing backwards through the filter in the wrong direction and back flushing your system when the pump is shut off. This is a crucial step in keeping your pool clean and operating properly. Without the valve, you’ll dirty your pool—and possibly even damage the filter.
The Bypass
On some days, you won’t want water flowing into your solar water heating array—this is why you’ll want to install a simple bypass between the first and second vertical pipes. It’s a manual valve that you’ll close when you want the solar heater to have a chance of operating, and open up to create a straight passage through that original loop you had before you installed any solar plumbing.
The Motorized Valve and Sun Sensor
If you want to automate your heating array, you’ll need a motorized valve connected to a power source, and a sun sensor. The sun sensor can pick up sunlight conditions, and the motorized valve automatically opens or closes the passage to the solar collectors. Mount the sun sensor up on the roof and wire it to your motorized valve that’s going to be installed right at the corner of the first vertical pipe and the elbow going off to the second vertical pipe on that horizontal passageway you made earlier. The valve serves as a switch, sending water up into the collectors when sun conditions are good, and diverting water across that horizontal path to the outlet pipe and effectively bypassing the collectors when conditions aren’t ideal.
Isolation Valves
The last step of your installation is the isolation valves. These manual open-and-close valves go near the bottom of each of the two vertical pipes. They’re located there so you can isolate your solar collector system completely from your original loop. You’ll use them for flushing out the solar collector loop, or any other maintenance or repair you want to make to one system or the other—but not both at the same time.
Once you get the isolation valves in place, you’ll have a fully working solar heating system attached to your pool. Now it’s just a matter of testing it out and making sure that it all works.
Test out your solar pool heater
Once you’ve completed the installation, it’s important to test everything. For a simple way to ensure your system is working properly, take a temperature reading of the water heading into your pool on a warm, sunny day. Compare that temperature to the overall pool temperature taken farther away from the inlet. If the inlet water is higher in temperature and your heater isn’t running (if you have one) then you know your system is producing heat and warming up the pool.
Find the Right Contractor for Your Solar Project
Whether you’re ready to begin your project now or need some expert advice, our network of contractors are here to help. With a few simple questions, we’ll find the best local professionals for you
Reviews from Real Homeowners
Welcome to Homeowner Resources! We are the Modernize blog. Modernize pairs more than 3 million homeowners a year with pre-vetted contractors in their area. This blog started because we believe homeowners should know everything about their homes, from how their HVAC works to which front door colors they might love. On Homeowner Resources, you can find information on every part of your home, right down to how you can negotiate with contractors to get the best price. Here's more about the blog.
Need a contractor? Learn more about how Modernize finds the right pro for you.
