Are you doing a cabinets project?
Modernize can pair you with three to four pros in your area, so you can compare options and save time and money.
Many homeowners dream of a complete kitchen remodel, but budgeting for a project of this scope is a different story! Luckily, there are easy ways to renovate your kitchen without paying thousands of dollars. Painting kitchen cabinets is a great way to refresh the look and feel of your kitchen. It can also be an ideal way to save money and time during a kitchen renovation.
Below is a step-by-step guide for how to paint kitchen cabinets.
Steps to Painting Your Kitchen Cabinets.
Transforming your kitchen doesn’t have to mean a complete overhaul. A simple yet impactful way to breathe new life into this heart of the home is by painting your kitchen cabinets.
Whether you’re aiming for a sleek modern look, a cozy cottage vibe, or a bold statement with high-contrast colors, painting cabinets can dramatically change your kitchen’s atmosphere.
This guide will walk you through the essential steps to painting your kitchen cabinets, ensuring a smooth and successful update that will refresh your space without the need for a full kitchen renovation or remodel.
Step 1: Understand the Paint Job
How to paint kitchen cabinets? Well, first you need to know if you have the type of cabinet that can be painted.
| Cabinet Type | Is This Cabinet Paintable? |
|---|---|
| Metal | Yes |
| Wood | Yes |
| Wood-laminate | Yes |
| Plastic-laminate | Yes, but it requires special techniques. You will need a specialist. |
| Damaged/warped materials | No |
If the woodwork is damaged or warped, it may be best to purchase new, unfinished cabinet doors and paint them alongside any existing cabinets you are able to keep.
Once you know your cabinets are paintable:
- Consult with an experienced paint dealer to select suitable paints for your specific cabinet type.
- Test a sample of the paint on an unnoticeable area of the cabinet.
- In addition to evaluating your color selection, check the paint will bond properly with the material.
If you find that the paint is not bonding or that many of your cabinets or door fronts are damaged, you should consider getting an expert opinion from a contractor. It may be that your cabinets need to be replaced instead of refreshed.
Step 2: Remove Hardware and Doors
To make the surfaces as smooth and even as possible and to protect your belongings, you need to remove everything in and on your cabinets before you start. Here’s the order to do that in.
- Empty out all cabinets and drawers.
- Number every door and mark the appropriate location as features like latches and pulls are removed (that’s step four below). Avoid mixing them up — otherwise, the hinges will not line up properly.
- Remove all drawers and cabinet doors.
- Remove all latches, pulls, knobs, and other pieces of hardware.
- Place the screws and the hardware you are removing in clear bags, labeled according to what door/drawer they belong to. This makes locating them easier when it is time to reassemble the cabinets.
Step 3: Clean the Surfaces
The kitchen is a work area where splatter, grease, heat, and steam are common occurrences. For that reason, cleaning the surfaces of the doors and drawers prior to painting or sanding is an important step.
Find the Right Contractor for Your Cabinets Project
Whether you’re ready to begin your project now or need some expert advice, our network of contractors are here to help. With a few simple questions, we’ll find the best local professionals for you
Use a solution of water, vinegar, and salt and a toothbrush to scrub stains, then rinse thoroughly. Be sure to avoid entirely soaking the cabinets with water to avoid damage.
Before painting or sanding, allow all the doors to dry completely.
Step 4: Sand the Surfaces
Lightly sanding the doors preps them to hold paint effectively. In some cases, you can use a wood sanding block to avoid rounding the edges.
When sanding the cabinets, removing all the existing paint is not required.
When existing paint is flaky, this may suggest that the finish did not bond properly with the wood. In most cases, this is a result of grease or moisture seeping into the wood or under the paint. Sand these areas down and then use a stain-removing spot-primer.
Step 5: Apply Primer-Sealer
Apply primer evenly to all surfaces to guarantee a properly bonded coat. Primer-sealer offers a solid base for water-based or semi-gloss paints.
In the past, high-gloss paint was popular for its stain and water resistant features. However, water-based finishes are currently better to work with and offer a more durable finish for kitchen cabinets.
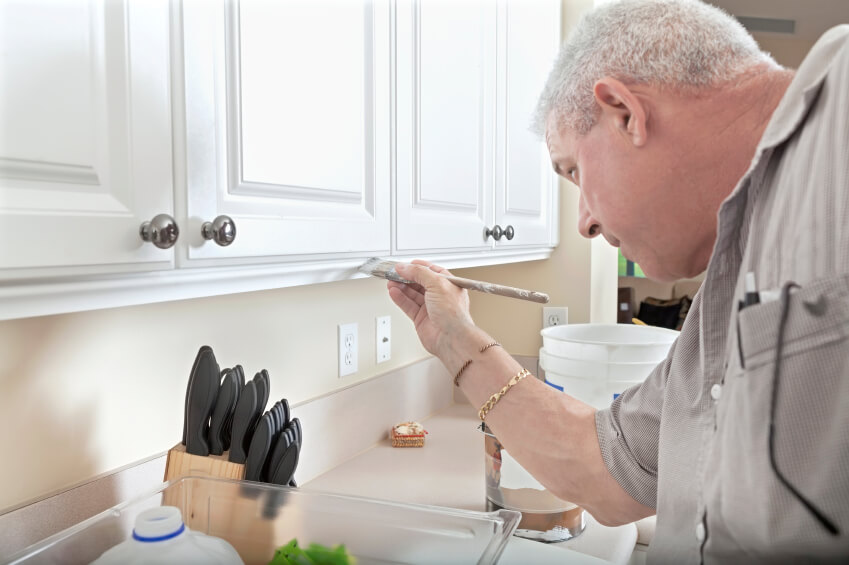
Step 6: Apply the Paint
Use a foam sleeve mini roller for flat surfaces, and an angled brush or flat brush for edges and detailed areas. Here is the order to paint each piece in to get the best possible results.
- Begin by painting the openings and the inside edges.
- Next, paint the sides of the outer cabinet, and then the frame face fronts.
- Paint any wood pieces or molding.
- Paint the drawers and cabinet doors. When these parts incorporate raised or detailed features, it is best to allow the paint to flow into the corners and gaps evenly. However, avoid allowing the paint to accumulate in one spot.
Let the paint dry for around three hours between each coat.
Prior to every coat, it is useful to lightly sand the surfaces to prep for the next coat. For most cabinets, two quality coats of paint is more than enough to offer a rich appearance. However, applying a third coat can help protect the cabinets from the daily punishment of heat, splatter, and frequent use.
If you are ready to explore painting your kitchen cabinets and would prefer to leave it to a professional, check out our database of experienced contractors in your area who are ready to take on the project.
Find the Right Contractor for Your Cabinets Project
Whether you’re ready to begin your project now or need some expert advice, our network of contractors are here to help. With a few simple questions, we’ll find the best local professionals for you
-
 maintenance and care
20 Easy Kitchen Remodel Ideas on a Budget
Is a full-on kitchen remodel out of the question? You can still give the busiest room in your home small makeovers that pack a lot of punch. Read on for... -
 maintenance and care
5 Ways to Add Functional Appeal to Your Kitchen Design
A kitchen is the heart of a home. It’s where we gather with our families and friends to do everything from cook and eat, to study, hang out, and socialize.... -
 research and planning
6 Ways to Refresh Your Kitchen on a Budget
The kitchen is well known as the heart of the home. And because of all that time spent in the same gathering spot, you want your kitchen to feel fresh,... -
 cost and budgeting
10 Kitchen Remodeling Ideas on a Budget
Do you love the idea of a kitchen remodel but not the hefty price tag that comes with it? Then good news: you are in the right place. Here, we...
Reviews from Real Homeowners
Welcome to Homeowner Resources! We are the Modernize blog. Modernize pairs more than 3 million homeowners a year with pre-vetted contractors in their area. This blog started because we believe homeowners should know everything about their homes, from how their HVAC works to which front door colors they might love. On Homeowner Resources, you can find information on every part of your home, right down to how you can negotiate with contractors to get the best price. Here's more about the blog.
Need a contractor? Learn more about how Modernize finds the right pro for you.