
Are you doing a deck project?
Modernize can pair you with three to four pros in your area, so you can compare options and save time and money.
Gas fire pits marry the cozy warmth of a backyard fire with ease and convenience. Instead of spending your time chopping wood, obtaining a fire permit, and struggling to light a fire the old-fashioned way, you can set up your own gas fire pit for backyard campouts at the touch of a button. And while fancy gas fire pits can cost hundreds of dollars, it’s easy to buy an expensive gas fire pit and then create a base or seating around it to create a cozy outdoor space you can use year round.
Here are some of the DIY gas fire pit options to consider:
The Covered Fire Pit
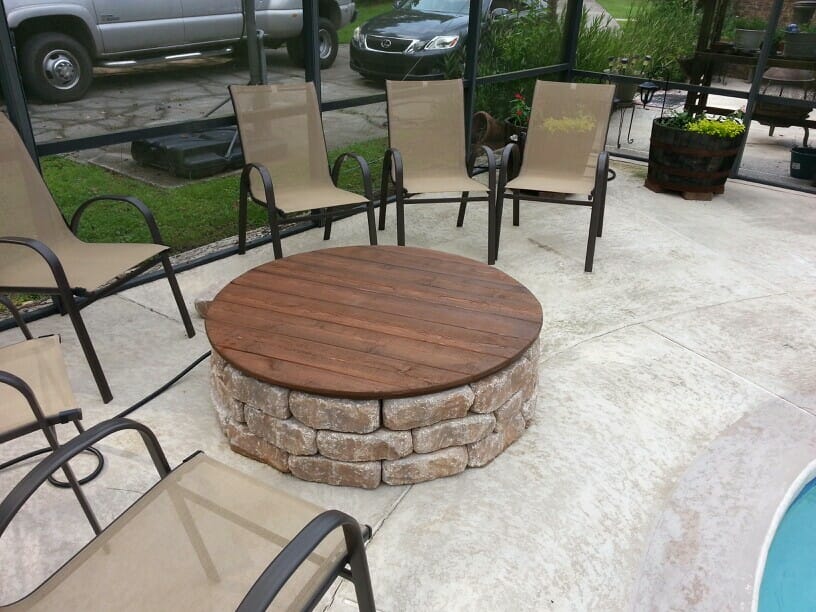
Image Source: Pinterest
The Concrete Fire Pit

Image Source: Man Made DIY
The All-in-One Fire Pit
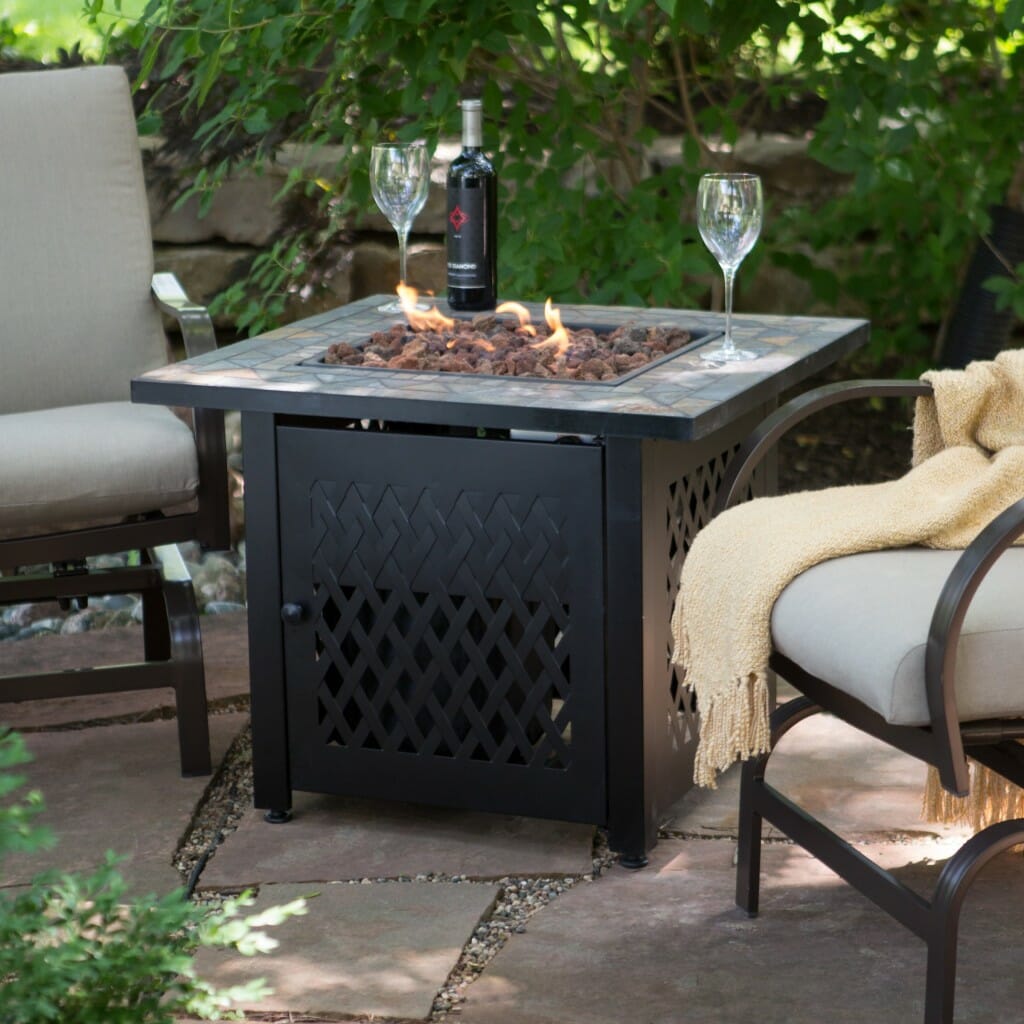
Image Source: Hay Needle
There were so many options, but we knew we wanted something simple and inexpensive that the whole family could enjoy. So when we found a fire pit kit on sale at our local home improvement store, we decided to DIY a custom table for it and transform our deck for lots of summer entertaining. Here’s how we did it!
Supply List:
- Fire pit kit (this plan uses a circular fire pit)
- 5 ten-foot x 5 and 1/2, 5/4 inch deck boards
- 2 ten-foot 1 1/2 x 1 1/2 inch railing balusters
- 1 3 x 5 cement board
- 1 box 3-inch exterior screws
- 1 bottle polyurethane glue
- 2 1/2 inch by 1 inch x 10 foot cedar
- Cabinet door magnets
- 6 ceramic tiles of your choice (optional)
- Tools needed: drill, nail gun, jig saw, chop saw or saw of your choice, utility knife, tile saw and tiling tools if choosing tiling
Directions:
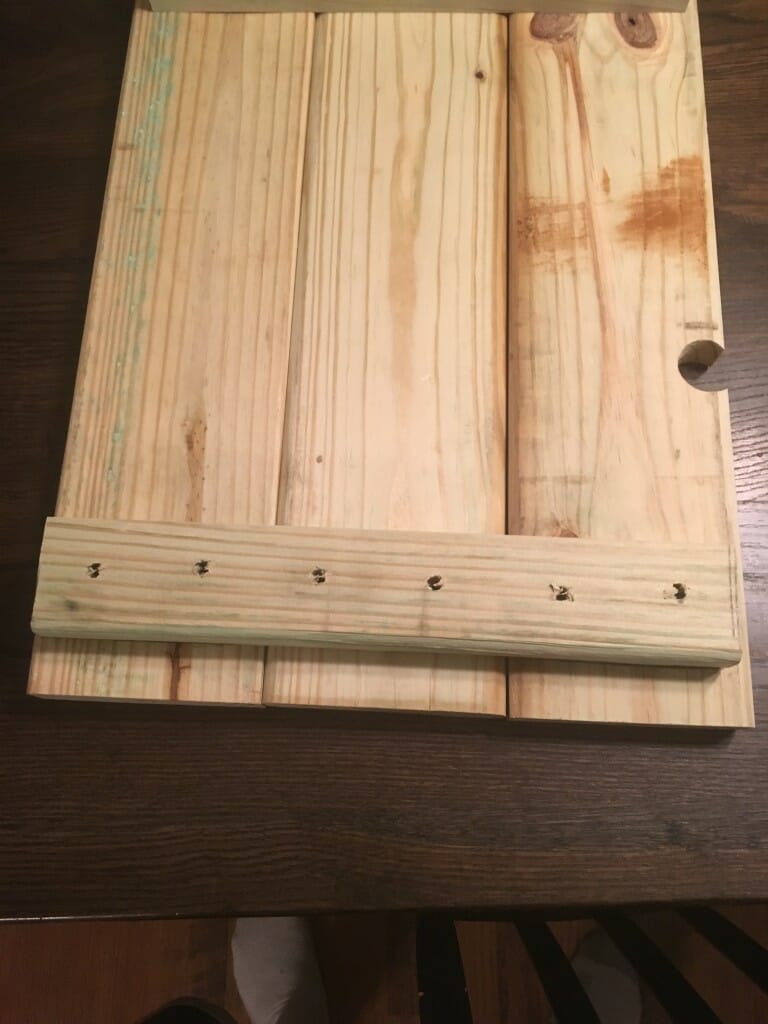
Lay out five deck boards for the box’s exterior to determine the width of your box. Next, build two wooden frames with the 1 and 1/2 by 1 and 1/2 balusters to the width.
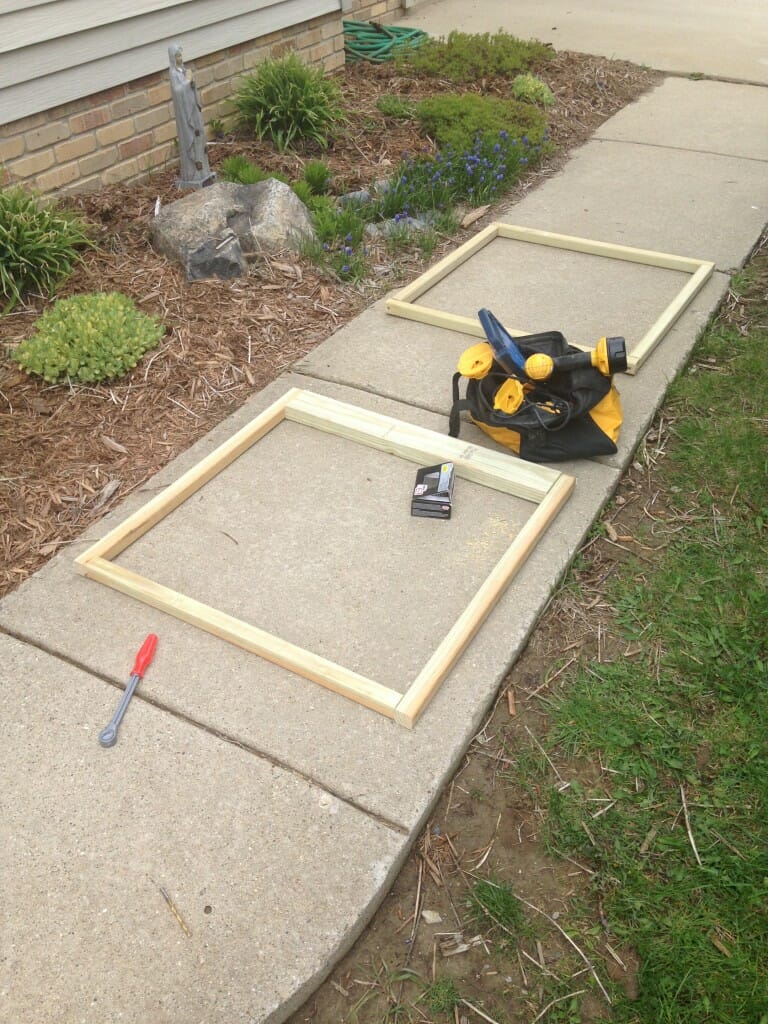
Cut enough deck boarding to cover each side of the frame. Using these dimensions, you will cut five 24 ” long boards for each side, for a total of twenty.
Next, nail four of the cut deck boards to the corners of each frame, so that one frame is suspended over the other. Work your way around to nail the remaining deck boards in, leaving three boards out of the middle of one side to construct the door.
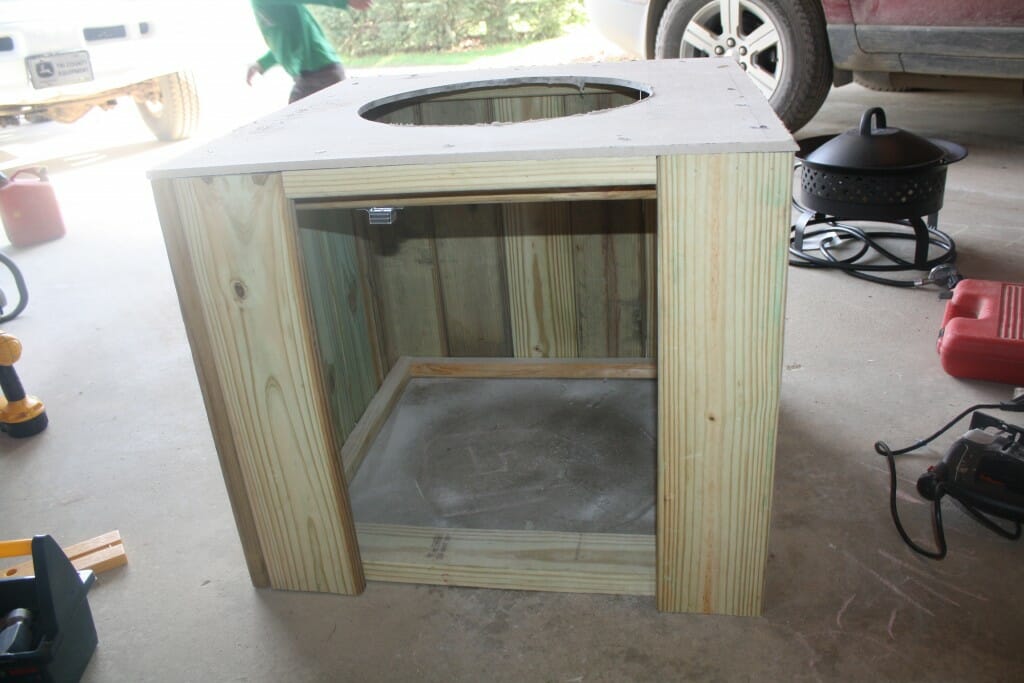
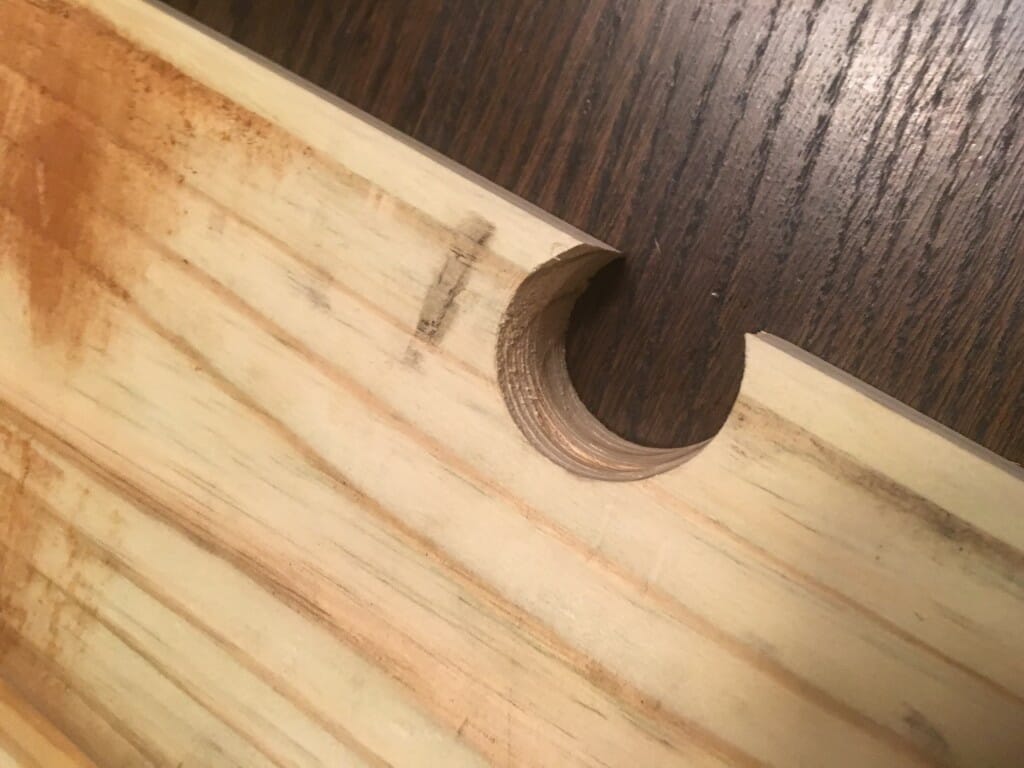
As you construct the door, be sure to drill a hole on the very edge of the door that is large enough for the propane hose.
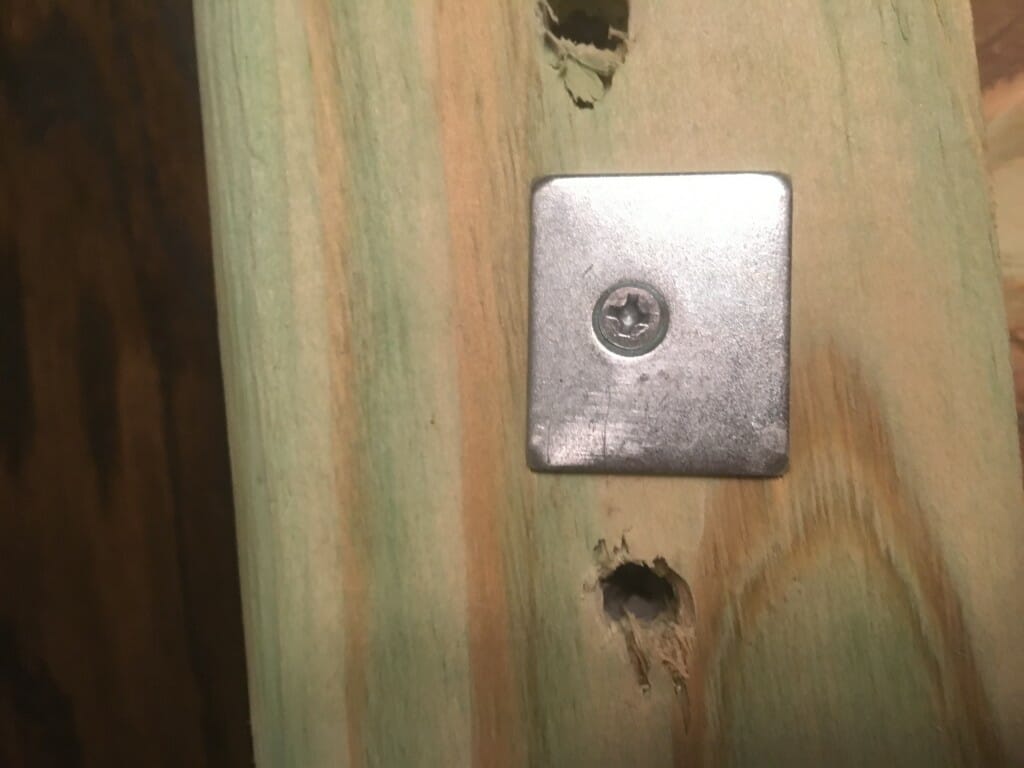
Screw the balusters onto the back of deck boards to complete the door. Attach the door with cabinet door magnets.
Find the Right Contractor for Your deck Project
Whether you’re ready to begin your project now or need some expert advice, our network of contractors are here to help. With a few simple questions, we’ll find the best local professionals for you
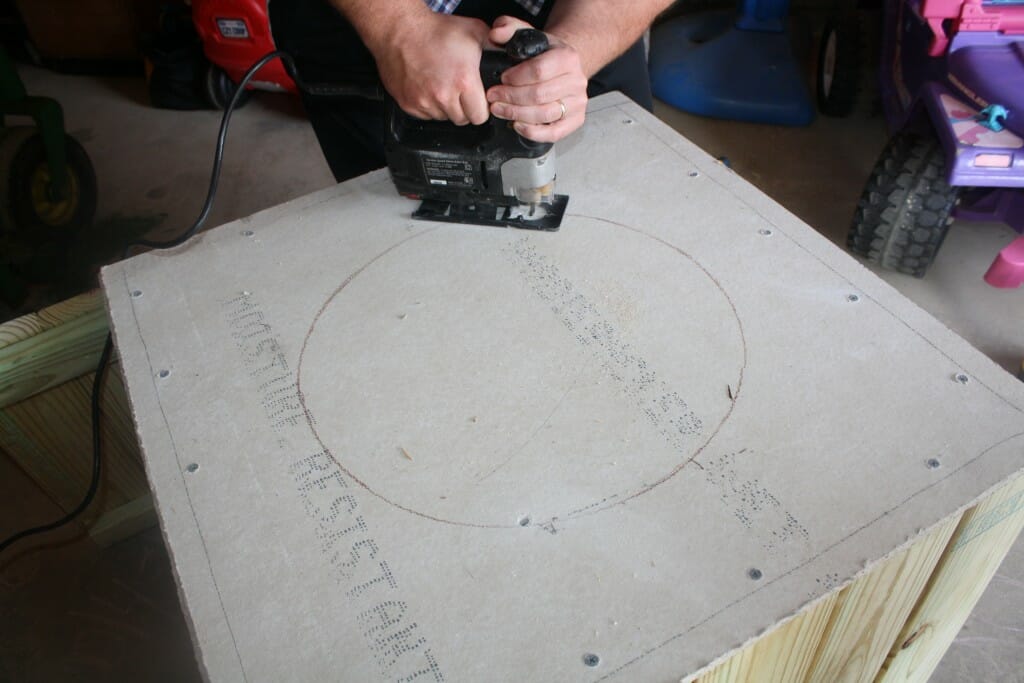
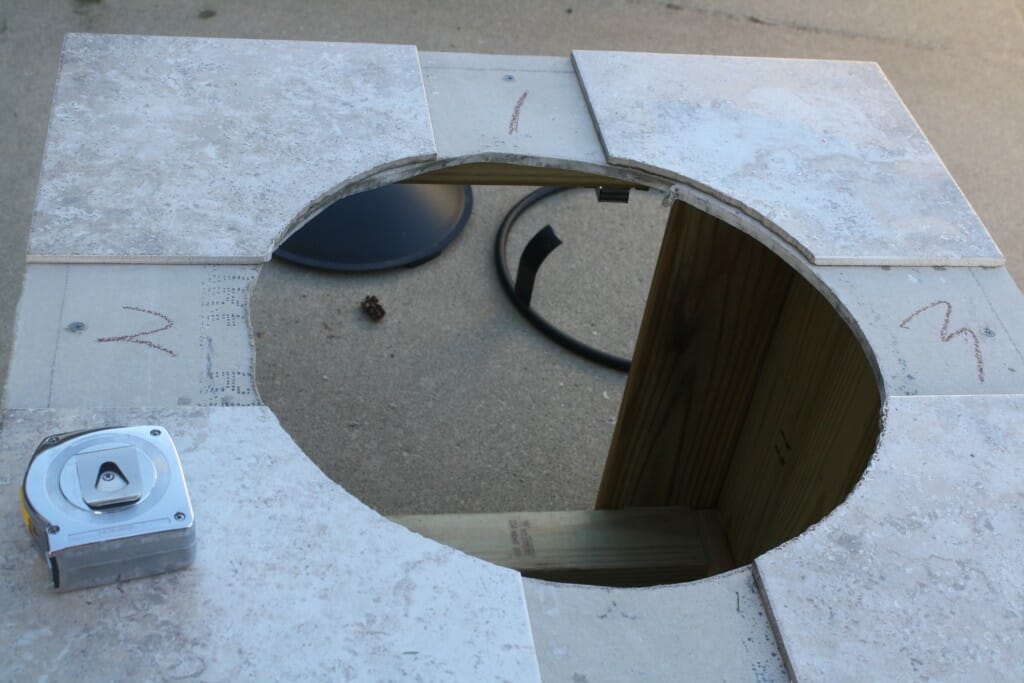
Cut your cement board to fit the dimensions of the top frame, a 30 x 30 inch square. This should fit flush when set on the top of the fire pit frame. Secure the board with screws and all joints of the frame with the construction glue. Use the base of the fire pit to draw a template to cut out a hole on the cement board. It’s important to make the hole a 1/2 inch smaller in each direction so that fire pit does not fall through. Cut the cement board with a jig saw.
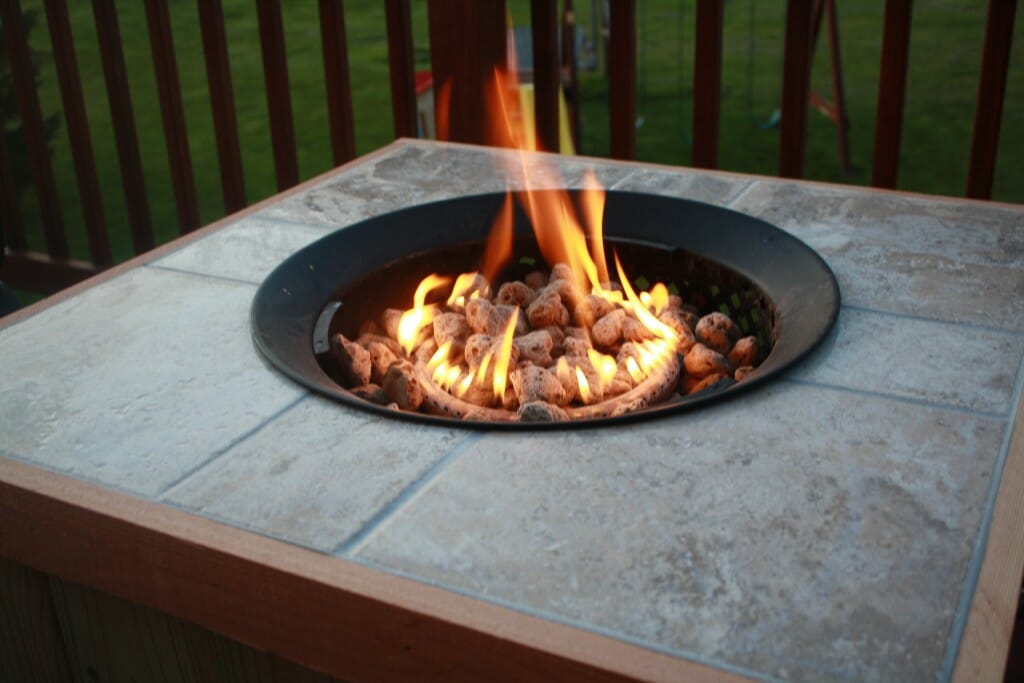
If you want, you can top with tile and grout to give the pit a finished look. Choose any type of tile you want, but keep in mind that the fire will heat whatever material you choose.
When you’ve finished tiling, band the edges with cedar trim to hide the edges of the tile. Let the tile dry overnight, and once you’ve fitted the fire pit into the frame, you’re ready to light a fire! Also be sure to check the manufacturer’s directions on your fire pit for proper handling and placement of the propane tank for your fire pit before you use it.
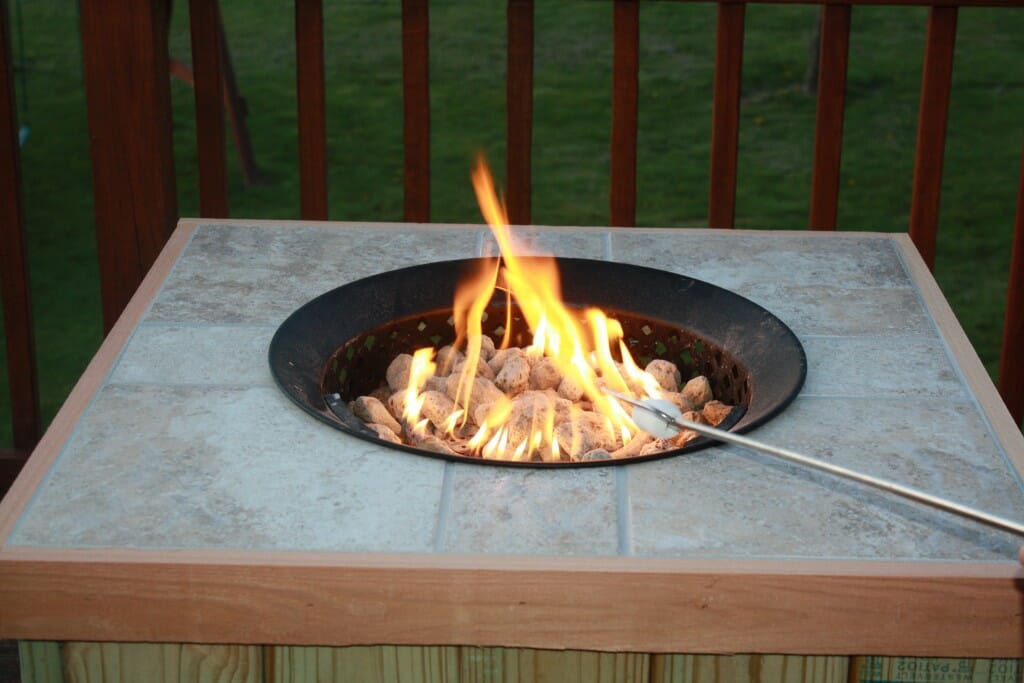
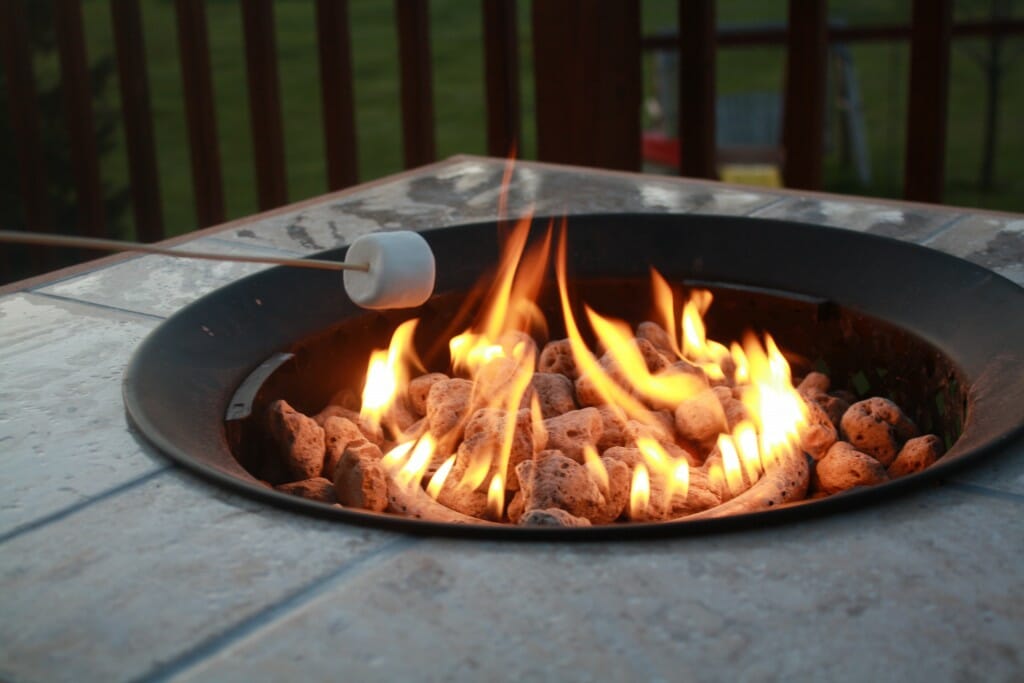
With just a little bit of elbow grease, you can DIY this simple and inexpensive gas fire pit to transform your deck for a future of cozy evenings. And don’t forget to bring the marshmallows!
Find the Right Contractor for Your deck Project
Whether you’re ready to begin your project now or need some expert advice, our network of contractors are here to help. With a few simple questions, we’ll find the best local professionals for you
-
 cost and budgeting
Affordable Home Upgrades
We’ve all had that moment walking into a room thinking, “It’s fine, but…” Sometimes it’s dated hardware. Sometimes it’s lighting. Sometimes it’s just that nothing feels fresh anymore. Here’s the... -
 maintenance and care
Natural Gas Generators and Carbon Monoxide: What Homeowners Should Know
Understanding the Concern Natural gas generators are one of the most popular standby power options for homeowners. They connect directly to your home’s gas line, which means no hauling fuel... -
 installation
15 Practical Ways Homeowners Can Use a Generator
More Than Just Backup Power When people think about generators, they often picture them humming away during a blackout. While that is their most common role, generators are surprisingly versatile.... -
 maintenance and care
Diesel Generator Maintenance Made Simple: 10 Must-Know Steps
Why Regular Generator Care Matters A diesel generator can be a rock-solid backup power source, but like any engine, it needs consistent care to keep running reliably. Skipping maintenance can...
Reviews from Real Homeowners
Welcome to Homeowner Resources! We are the Modernize blog. Modernize pairs more than 3 million homeowners a year with pre-vetted contractors in their area. This blog started because we believe homeowners should know everything about their homes, from how their HVAC works to which front door colors they might love. On Homeowner Resources, you can find information on every part of your home, right down to how you can negotiate with contractors to get the best price. Here's more about the blog.
Need a contractor? Learn more about how Modernize finds the right pro for you.